
Ali is a Canada-based roofer who has spent around five years working hands-on in roofing, from servicing to installs. He started this site to share what he has picked up on the job in plain, practical guides. Each article is written to be clear, useful, and grounded in real roofing work rather than theory.
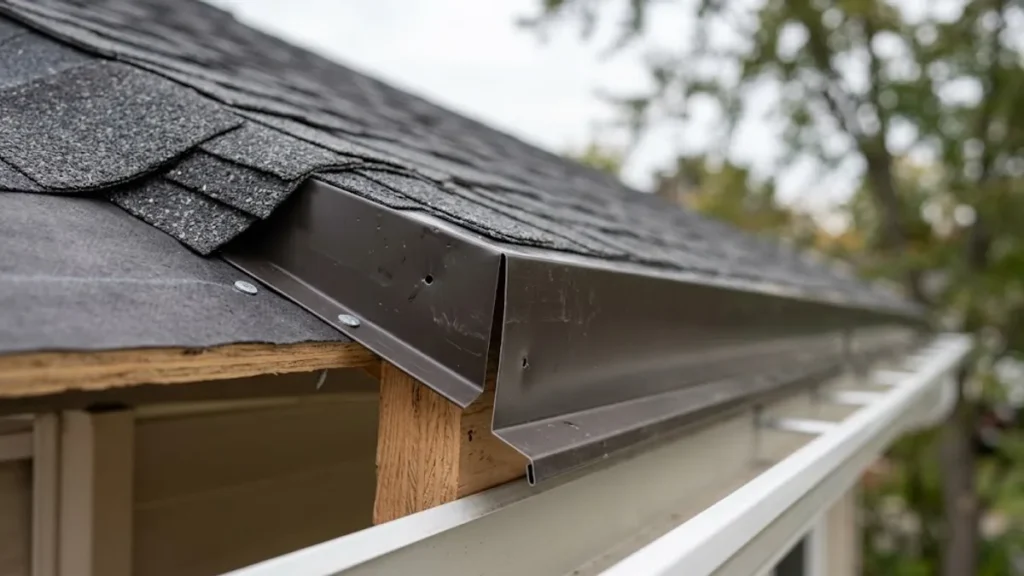
Roof drip edge flashing is a strip of angled metal fixed along the edges of a roof to carry rainwater away from the fascia and roof deck and into the gutter. It runs along the eaves (the low, horizontal edges) and the rakes (the sloped side edges). The metal has a small lip that pushes water past the wood, so it drips clear instead of curling back under the shingles. That single detail prevents a long list of expensive problems: rotted fascia, soaked sheathing, stained soffits, and gutters that pull away from the house.
If you only remember one thing, remember this. Water follows the edge of whatever it touches. A flat cut piece of wood lets water wrap around and soak in. A metal edge with a kick-out breaks that path and forces the water to let go. That’s the whole job. Below, you’ll get the types, the profiles, the exact install order relative to your underlayment, how to choose, and what it costs.
What Is a Roof Drip Edge?
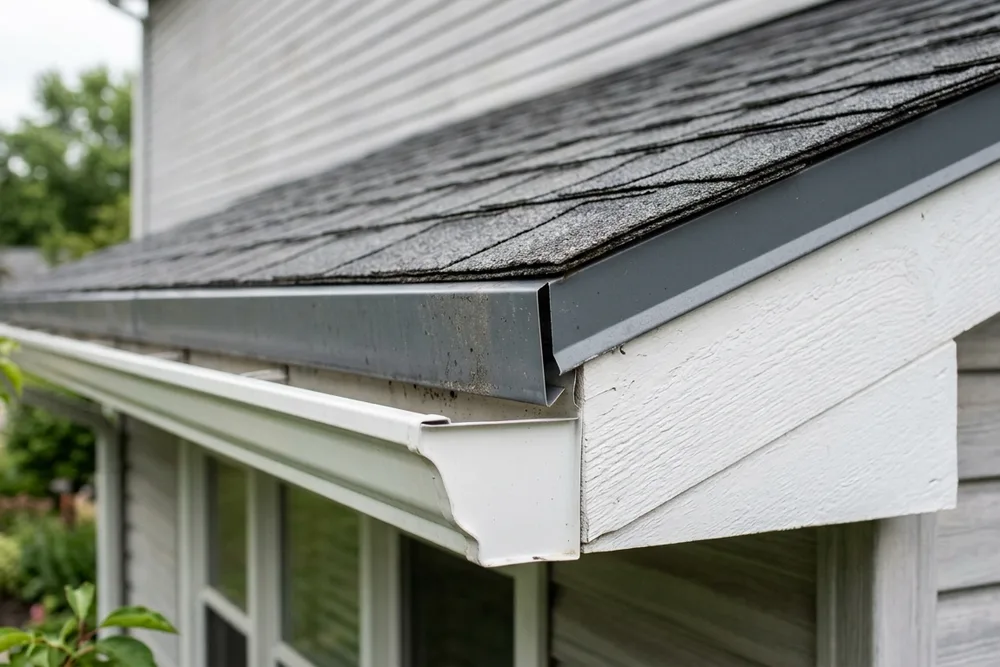
A drip edge is a formed piece of metal, usually aluminum or galvanized steel, bent into an L or T shape. One flange sits flat on the roof deck under the shingles. The other flange folds down over the edge of the roof and ends in a small outward lip. Rain rolling off the shingles hits that lip and drops away from the wood behind it.
People ask “what is a roof drip edge” and “what is drip edge flashing on a roof” as if they’re two things. They’re the same component. “Drip edge” is the short name, and “drip edge flashing” is the fuller term that groups it with the other flashings on a roof, like valley flashing, step flashing, and kick-out flashing.
Here’s what it actually protects:
The fascia board, which is the vertical board your gutters hang on. Without an edge, water sheets down behind the gutter and rots it.
The roof deck (the plywood or OSB sheathing). Wind driven rain can push water back under the first course of shingles. The edge metal gives that water somewhere to go.
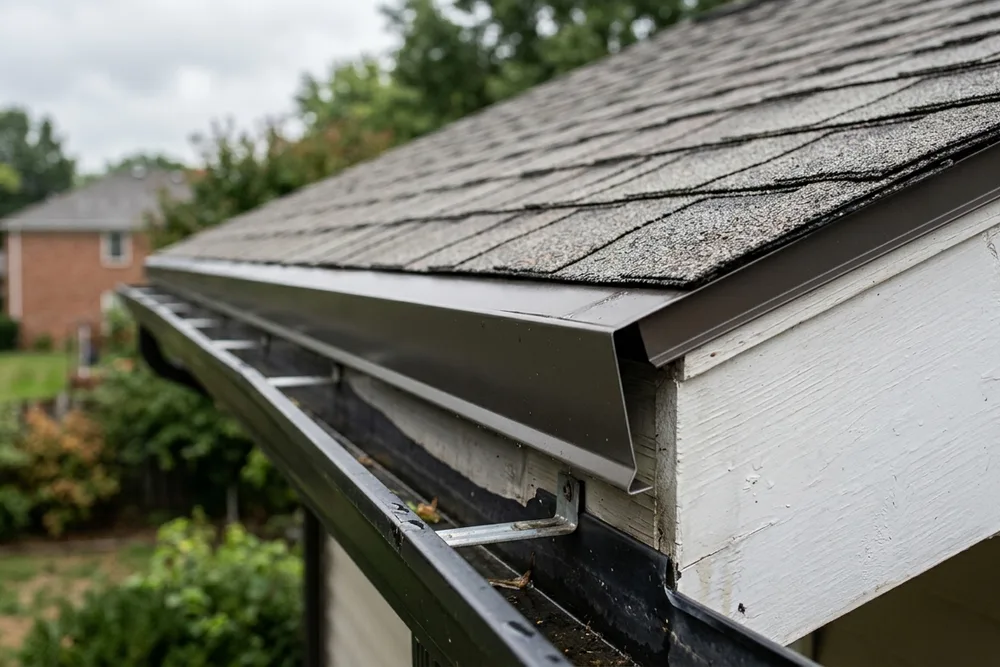
The gutter itself. When the metal lip overhangs into the gutter, water lands where it should instead of splashing behind it.
The soffit and any wood trim below. Dry wood lasts decades. Wet wood invites rot and carpenter ants within a few seasons.
A roof edge flashing profile is not decorative trim, even though it does clean up the look of a roof line. It’s a working part of the water management system, and it does its job silently for years when installed correctly.
Is Drip Edge Flashing Necessary?
Short answer: yes, and in most of North America it’s required by code. Whether drip edge flashing is necessary used to be a debate among older roofers who skipped it to save money. That debate is over.
The 2018 and later International Residential Code (IRC) added a clear requirement. Section R905.2.8.5 calls for a drip edge at eaves and rake edges of shingle roofs. The metal must extend at least 0.25 inch below the roof sheathing and back onto the deck at least 2 inches. Adjacent pieces must overlap by 2 inches. Many jurisdictions adopt the IRC directly, so your local inspector will look for it on a permitted job.
Do building codes require drip edge flashing everywhere? Not literally every square mile, because code adoption varies by state, county, and city. But the trend is one direction. If you’re pulling a permit for a re-roof or new build in the United States or Canada, plan on installing it. Skipping it can fail inspection and can void some shingle manufacturer warranties, since brands like GAF and Owens Corning reference proper edge metal in their installation instructions.
Beyond code, there’s the money argument. A fascia replacement runs a few hundred dollars per section once rot sets in, and a soft roof deck edge means tearing back shingles to fix sheathing. The edge metal that prevents all of that costs a dollar or two per foot. That math favors installing it every time.
There’s one honest caveat. On some older homes with deep gutters mounted tight to the fascia and generous overhangs, water rarely reaches the wood. Those roofs sometimes lasted decades without edge metal. That’s luck and geometry, not a reason to skip it on a new roof. Modern shingle warranties and codes assume the metal is there.
Different Types of Roof Drip Edge Materials
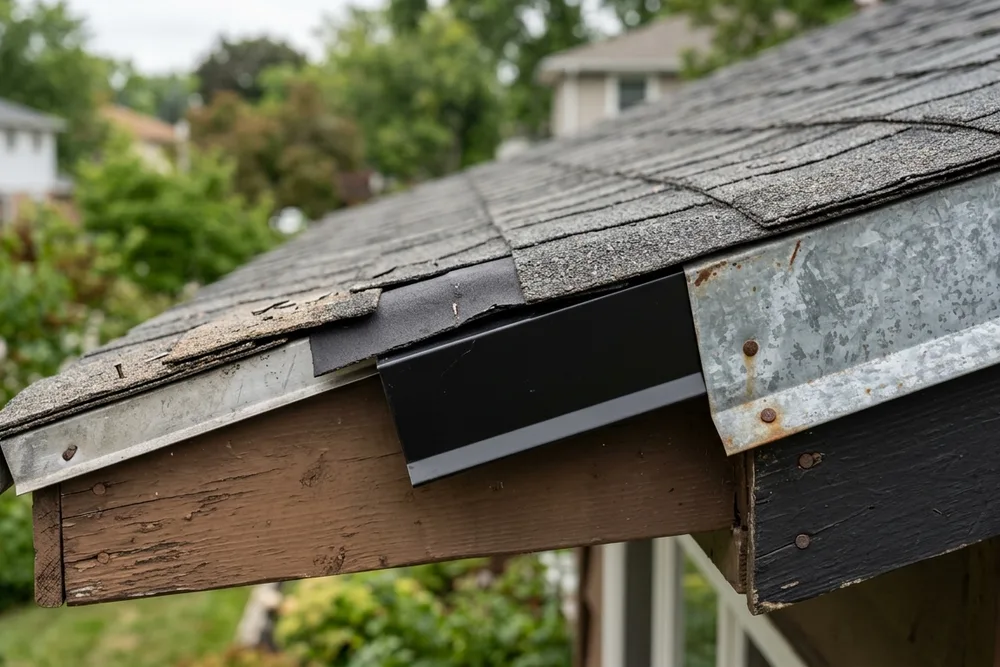
The different types of roof drip edge materials come down to four common choices: aluminum, galvanized steel, copper, and plastic or vinyl. Each has a place. The right pick depends on your climate, your budget, and whether the metal will be visible.
Aluminum is the default for most homes. It never rusts, it’s light, it bends easily around corners, and it comes prefinished in white, brown, black, and other colors to match trim. Typical thickness is 0.019 inch, sometimes called.019 gauge. It’s the material most residential drip edge flashing is made from today.
Galvanized steel is stronger and stiffer. It resists dents and holds a straight line on long runs, which matters on commercial jobs and windy sites. The zinc coating protects the steel, but cut edges and scratches can rust over time, especially near salt air. It costs a little more than aluminum in most markets.
Copper is the premium choice. It lasts a century or more, weathers to a green patina, and looks stunning on slate, cedar, and historic homes. It also costs three to six times as much as aluminum, so it usually appears on high end or heritage projects where the look is the point.
Vinyl and plastic edge trims exist for very light or budget work, like sheds and some coastal jobs where any metal corrodes. They’re cheap and rust proof, but they get brittle in cold and can crack under UV over the years. Most roofers avoid them on primary homes.
Which is best? For the vast majority of houses, aluminum wins on value, color options, and corrosion resistance. Steel wins where strength and wind matter. Copper wins where budget allows and appearance leads.
| Material | Rust resistance | Typical lifespan | Relative cost per foot | Best for |
|---|---|---|---|---|
| Aluminum (.019) | Excellent, never rusts | 25 to 40 years | $1.00 to $2.00 | Most homes, color matching |
| Galvanized steel | Good, cut edges can rust | 20 to 30 years | $1.50 to $2.50 | Windy sites, commercial |
| Copper | Excellent, patinas | 75 to 100+ years | $4.00 to $8.00 | Historic, slate, cedar, premium |
| Vinyl / plastic | Total, never corrodes | 10 to 20 years | $0.50 to $1.50 | Sheds, budget, salt air |
A quick note on sizing. Retail edge metal comes in a few standard lengths. Big box stores stock 10 foot and 10.5 foot sticks, and you’ll also find roof drip edge flashing 60 inch (5 foot) sections that are easier to carry and handle on small jobs. Pros buy in 10 foot bundles to cut down on overlaps.
Roof Drip Edge Profiles
Profile means the bent shape of the metal, and it changes how water sheds and how the piece sits on the roof. There are three main profiles, named by letter. Understanding the type of drip edge roof pros reach for helps you spec the right one.
Type C is the classic L shape. It has two flanges bent at 90 degrees, plus a small hemmed lip at the bottom for stiffness and to fling water clear. So what is a type C drip edge in plain terms? It’s the simplest profile, an angle with a lip, and it’s common on eaves and rakes of standard shingle roofs. If someone says “L style,” they mean Type C.
Type D is the T shape, sometimes called T style or “extended” drip edge. It has a longer leg that projects out and then folds down and back, creating a little T at the edge. That extra projection holds water even further off the fascia, which is why inspectors in wet regions often prefer it. Type D is the better performer when overhangs are short.
Type F is the long flange or “gutter apron” profile. It has an extended top leg, often 2 to 4 inches, designed to reach out over existing gutters or to be added on a roof that already has shingles. Roofers use Type F when retrofitting edge metal onto a finished roof, or to bridge a wide gap into a gutter.
There’s also a separate piece worth naming: the gutter apron. It looks like an oversized Type F and specifically directs eave water into the gutter rather than behind it. On homes where water keeps sneaking behind the gutter, a gutter apron at the eave fixes it.
| Profile | Common name | Shape | Where it shines | Notes |
|---|---|---|---|---|
| Type C | L style | L with hemmed lip | Eaves and rakes, standard roofs | Simplest, widely stocked |
| Type D | T style / extended | T profile, folds back | Short overhangs, wet climates | Holds water further off fascia |
| Type F | Long flange / gutter apron | Extended top leg | Retrofits, over gutters | Great for adding to finished roofs |
For metal roofs, the edge detail differs. A metal roof drip edge detail usually pairs the drip metal with a matching eave trim or “peak/eave” trim that the panels lock into, and the profile is often custom bent to the panel’s rib height. The principle is identical, but the parts are cut to suit standing seam or corrugated panels rather than asphalt shingles.
How Drip Edge Is Installed and Where It Goes Relative to Underlayment
This is the part most guides gloss over, and it’s the part that decides whether your roof actually stays dry. The order of layers at the edge is not optional, and it’s different at the eaves than at the rakes. Get it backward and you route water into the wood instead of away from it.
Here’s the rule, stated plainly. At the eaves, drip edge goes under the underlayment. At the rakes, drip edge goes over the underlayment. Roofers remember it as “under at the bottom, over on the sides,” or “eaves under, rakes over.”
Why the difference? It’s all about which way the water is moving.
At the eave (the bottom edge), any water that gets under the shingles is running downhill toward that edge. You want that water to reach the top of the drip metal and then flow over the outside face into the gutter. So the metal has to be under the felt or ice and water shield. If the underlayment ended on top of the metal, sub shingle water would run over the top flange and drip behind the drip edge, straight onto the fascia. That’s the failure you’re preventing.
At the rake (the sloped side edge), water is running down the slope, not toward the edge. Here you want the underlayment to sit on the deck first, then the drip edge on top of it, so any water on the felt stays on top of the metal and rolls off the face. If the metal went under the felt on a rake, wind driven water could get under the metal and reach the deck edge.
Here’s the step by step for a shingle roof, which is the most common drip edge flashing install:
- Start at the eaves. Nail the eave drip edge directly to the clean roof deck. Set nails about every 12 inches, closer (8 to 10 inches) in high wind zones. Use roofing nails long enough to bite the deck, and keep the nails high on the top flange.
- Overlap each piece by about 2 inches in the direction water flows, and cut and fold the corners so the metal wraps the corner without a gap.
- Roll out your ice and water shield or synthetic underlayment over the top of the eave drip edge. It should lap over the top flange of the metal so water on the underlayment lands on top of the drip edge. In cold climates, the ice and water membrane at the eave should extend up the slope past the interior wall line, commonly 24 inches or more inside the exterior wall.
- Now handle the rakes. Run your underlayment down the rake edges first.
- Install the rake drip edge on top of the rake underlayment, again nailing every 12 inches and overlapping pieces 2 inches. Start at the bottom of the rake and work up so upper pieces lap over lower ones.
- Where the rake meets the eave at the corner, the rake piece laps over the eave piece so water sheds cleanly down and off.
- Install shingles as normal. At the eave, the starter strip overhangs the drip edge by about 0.25 to 0.5 inch. At the rake, shingles overhang the metal by a similar small amount.
A few field notes that separate a clean job from a callback. Don’t nail through the vertical face of the drip edge, only the top flange. Don’t let the metal run long past corners without cutting relief so it can fold. And don’t rely on caulk to fix a wrong layer order. Caulk fails in a few years. Correct layering lasts as long as the roof.
If you’re adding edge metal to a roof that already has shingles, you can’t easily get under the underlayment. That’s where a Type F or gutter apron slides up under the first shingle course and over the underlayment as a retrofit. It’s not the textbook order, but it’s the practical fix on a finished drip edge roof.
Installation and Replacement Considerations
Beyond the layer order, a handful of details decide how long the edge metal holds.
Fasteners matter. Use roofing nails, not staples, and match the nail to the metal. Steel nails against bare aluminum in a damp coastal setting can cause galvanic corrosion over years, so many pros use aluminum or hot dipped galvanized nails with aluminum drip edge. Space nails about 12 inches on center, tightening to 8 to 10 inches on windy exposures.
Overlap and direction. Always lap pieces so the upstream piece sits on top of the downstream piece, following water flow. A 2 inch overlap is the code minimum for shingle roofs. Never butt two pieces edge to edge without an overlap, because that seam will leak.
Gutters. If you have gutters, the eave drip edge lip should reach into the gutter, or you add a gutter apron so water can’t track behind. A common leak complaint, water staining the fascia even with gutters, traces back to missing edge metal or a lip that stops short of the gutter.
Flat and low slope roofs. A drip edge flat roof detail is different from a pitched roof. On a membrane roof (EPDM, TPO, modified bitumen), the edge metal often doubles as a gravel stop or fascia edge, and the membrane wraps up and over it, then gets sealed. The metal is set first, the membrane is adhered over the top flange, and a termination bar or cover strip locks it. Because flat roofs hold water longer, the edge seal is critical, and many flat roof leaks start at a poorly bonded edge.
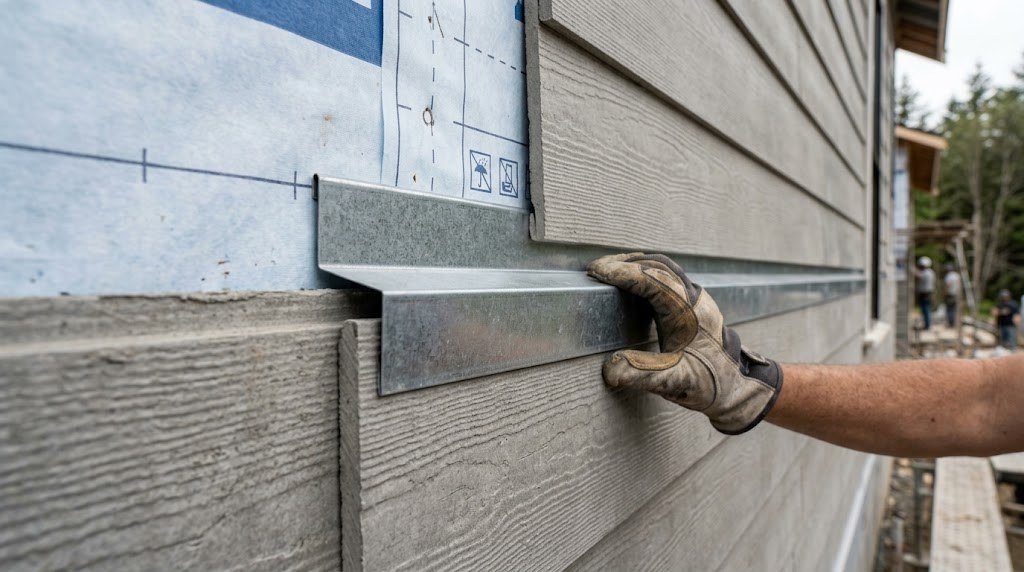
Windows and walls. The same idea shows up as drip edge flashing for windows, usually called a drip cap. It’s a small angled metal piece installed above a window or door head to shed water out and away from the frame. It sits under the siding or housewrap above and laps over the window flange, so wall water can’t run into the top of the window. It’s a different location, same physics.
Replacement. Edge metal usually gets replaced during a full re-roof, since it lives under the shingles. If you spot bent, rusted, or missing sections on an existing roof, a roofer can often replace short runs by lifting the first shingle course, pulling the old metal, and sliding in new. On a tear off, budget to replace all edge metal rather than reuse dented pieces. It’s cheap relative to labor, and reusing old metal on a new roof is a false economy.
Choosing the Right Drip Edge
The best pick depends on climate, roof type, overhang length, and whether you’ll see the metal. Here’s how to choose without overthinking it.
By climate. In heavy rain or coastal areas, favor aluminum for corrosion resistance and consider a Type D or gutter apron to throw water further off the fascia. In dry, high wind regions, galvanized steel holds a straighter line and resists dents from debris.
By roof type. Asphalt shingles pair with standard Type C or Type D. Metal roofs use panel specific eave trim and a matching drip detail. Flat roofs use a membrane compatible edge metal or gravel stop. Cedar and slate often get copper for looks and longevity.
By overhang. Short overhangs (less than 6 inches) benefit from Type D or F, since the extended projection keeps water off the fascia. Deep overhangs can get away with simple Type C.
By appearance. If the edge will be visible against white trim, buy prefinished aluminum in a matching color. Raw galvanized looks industrial and will show against painted fascia.
So what type of drip edge is best for my roof? For a typical asphalt shingle house with gutters in a mixed climate, prefinished aluminum Type D at the eaves and Type C at the rakes covers almost every case. Add a gutter apron at the eaves if you have a history of water sneaking behind the gutter.
| Situation | Recommended material | Recommended profile |
|---|---|---|
| Standard shingle roof, gutters | Aluminum | Type D eaves, Type C rakes |
| Short overhang, wet climate | Aluminum | Type D or gutter apron |
| High wind, debris exposure | Galvanized steel | Type C or D |
| Historic, slate, or cedar | Copper | Type C or custom |
| Retrofit onto finished roof | Aluminum | Type F / gutter apron |
| Flat or low slope membrane | Membrane compatible metal | Gravel stop / fascia edge |
Cost and Practicality
Edge metal is one of the cheapest parts of a roof, and one of the highest return. Here’s the real breakdown.
Material cost. Aluminum drip edge runs about $1.00 to $2.00 per linear foot. Galvanized steel is roughly $1.50 to $2.50. Copper jumps to $4.00 to $8.00 or more. At retail, a 10 foot aluminum stick often costs $8 to $15, and shorter 5 foot pieces cost less per piece but more per foot.
Labor. If a roofer installs it as a standalone job, labor adds about $1.00 to $3.00 per linear foot depending on access, height, and how many corners. During a full re-roof, the incremental labor is small because the crew is already working the edges.
Whole house numbers. An average single story home has roughly 150 to 200 linear feet of roof edge. Material alone might be $150 to $400 for aluminum. A standalone professional install often lands between $300 and $1,000. Rolled into a full roof replacement, the added cost is usually a few hundred dollars at most.
Is it worth the investment? Yes, and the math is not close. A single rotted fascia repair can cost $300 to $800 per section, and a damaged roof deck edge means tearing back shingles, replacing sheathing, and re-shingling, which climbs into the low thousands. Spending one to two dollars a foot to avoid that is an easy call. Add the code requirement and warranty protection, and there’s no real argument for skipping it.
DIY or pro? Installing edge metal is within reach for a confident DIYer on a single story roof during a re-roof, since the cuts and nailing are simple. The hard parts are the layer order and working safely at height. If you’re on a steep or tall roof, or you’re not tearing off shingles, hire a roofer. A mistake in the layering can cost far more than the labor you saved.
| Cost item | Low | High | Notes |
|---|---|---|---|
| Aluminum material (per ft) | $1.00 | $2.00 | Most common choice |
| Steel material (per ft) | $1.50 | $2.50 | Stronger, windy sites |
| Copper material (per ft) | $4.00 | $8.00+ | Premium look and life |
| Labor standalone (per ft) | $1.00 | $3.00 | Access and corners drive it |
| Whole house material | $150 | $400 | 150 to 200 ft, aluminum |
| Whole house pro install | $300 | $1,000 | Standalone job |
Enhance Your Home’s Aesthetics With Alsco Premium Siding and Roofing Products
Edge metal does more than shed water. It frames the roof line, and a clean, color matched edge sharpens the whole look of a house. That’s where product quality shows. Alsco premium siding and roofing products are built so the finished edge looks as good as it performs, with prefinished coatings that hold color and stay crisp against fascia and trim.
Color matching is the practical win. When your edge metal, gutters, soffit, and fascia trim share a coating system, the roof line reads as one continuous detail instead of a patchwork of mismatched grays and whites. Alsco’s finishes are designed to coordinate across those parts, so a black roof with black edge metal and black gutters looks intentional and modern, and a white trim package stays bright without chalking early.
Durability backs up the looks. A quality baked on finish resists fading, chalking, and scratching far longer than a bargain coating. On an edge that faces sun and rain every day, that difference shows up in five to ten years, when cheap metal looks tired and a premium finish still looks fresh. Choosing coordinated, well finished products at install time is the low effort way to keep a roof line sharp for the life of the roof.
Alsco Aluminum Building Products
Aluminum is the workhorse of residential edge metal, and Alsco aluminum building products cover the full edge system, not just a single piece. That means drip edge and gutter apron profiles, matching fascia and soffit, gutters, and downspouts, all in coordinated colors and gauges.
The advantage of a single source aluminum system is consistency. When every metal component comes from one product line, gauges match, colors match, and the parts are engineered to lap and fit together. You avoid the common problem of a slightly off white edge next to a slightly warmer white gutter. For roofers, that consistency speeds up installs and cuts callbacks. For homeowners, it means the roof edge, gutters, and trim age at the same rate and keep looking like a set.
Aluminum’s core strengths carry through the whole system. It never rusts, it stays light for easy handling on ladders and staging, it bends cleanly for corners and custom profiles, and it takes and holds a prefinished color. Paired across drip edge, fascia, soffit, and gutters, a coordinated aluminum package gives you a roof edge that manages water correctly and looks finished, which is exactly what good edge metal should do.
FAQ
What is drip edge flashing and why is it important?
It’s the angled metal strip along the eaves and rakes of a roof that carries water off the edge and into the gutter instead of behind the fascia. It matters because it keeps water off the wood, prevents rot and deck damage, and satisfies both building code and most shingle warranties. Without it, water wraps around the roof edge and soaks the fascia and sheathing.
Is drip edge flashing necessary, or can I skip it?
It’s necessary. Under the 2018 and later IRC, it’s required at eaves and rakes on shingle roofs, and many jurisdictions enforce that on permitted work. Skipping it can fail inspection, void some warranties, and lead to fascia and deck rot that costs far more than the metal would have. There’s no good reason to leave it off a new roof.
What is a type C drip edge?
Type C is the L shaped profile, two flanges bent at 90 degrees with a small hemmed lip at the bottom. It’s the simplest and most widely stocked profile, common on both eaves and rakes of standard shingle roofs. Type D (a T shape) projects water further off the fascia, and Type F (a long flange) is used for retrofits and over gutters.
How is drip edge installed relative to the underlayment?
The order flips depending on the edge. At the eaves, install the drip edge first, directly on the deck, then lap the underlayment over the top of it. At the rakes, install the underlayment first, then the drip edge on top of it. The memory aid is “eaves under, rakes over.” This routing sends sub shingle water over the edge metal at the eave and off the face at the rake.
What materials are drip edges made from, and which is best?
The common materials are aluminum, galvanized steel, copper, and vinyl. Aluminum is best for most homes because it never rusts, comes in matching colors, and is affordable. Steel suits windy or high impact sites, copper suits premium and historic roofs, and vinyl is a budget option for sheds and salt air. For a typical house, prefinished aluminum is the sensible default.
How much does drip edge flashing cost, and is it worth it?
Aluminum runs about $1 to $2 per linear foot for material, with pro install adding $1 to $3 per foot on a standalone job. A whole house often lands between $300 and $1,000 installed, or just a few hundred dollars extra during a full re-roof. It’s absolutely worth it, since one rotted fascia or deck repair costs more than edge metal for the entire roof.
What people are saying
Ben Harper on Quora“Home Improvement Construction Drip Edge Flashing (weatherproofing… Gutters Building Materials House Roofing Home Improvement Projects DIY Home Improvement + 5 What is the difference between gutters drip edge and roof flashing edge? All related (36) Sort Recommended Assistant Bot · 11mo Gutter…”
Sponsored
Steven Barnes on Quora“Home Improvement Construction DIY Projects Flashing (weatherproofing… Roofing Material Home Improvement Projects DIY Home Improvement Roofing Shingles Building Construction + 5 Is it OK for metal flashing to peek out from underneath shingles on the edge of a roof? All related (35) Sort…”
u/Stock-Plastic3785 on Reddit“This inside corner drip edge flashing looks wrong. The drip edge flashing is cut out in the middle, and the fascia behind it (gray color) is exposed. I am worried water will drip back behind the gutter and onto that fascia. Any recommendations on how it should be done? How to fix it? Pictures of…”
Ronald Greene on Quora“Home Improvement Construction DIY Projects Flashing (weatherproofing… Roofing Material Home Improvement Projects DIY Home Improvement Roofing Shingles Building Construction + 5 Does roof flashing go under shingles? Latest activity: Jun 11, 2026 All related (39) Sort Recommended Assistant Bot ·…”
Pingback: Roofing For Low Slope Roof: A Practical Guide - throneroofing.online
Pingback: Steel Roof Underlayment: A Practical Guide - Throne Roofing
Pingback: Roofing Z Flashing: A Practical Guide - Throne Roofing