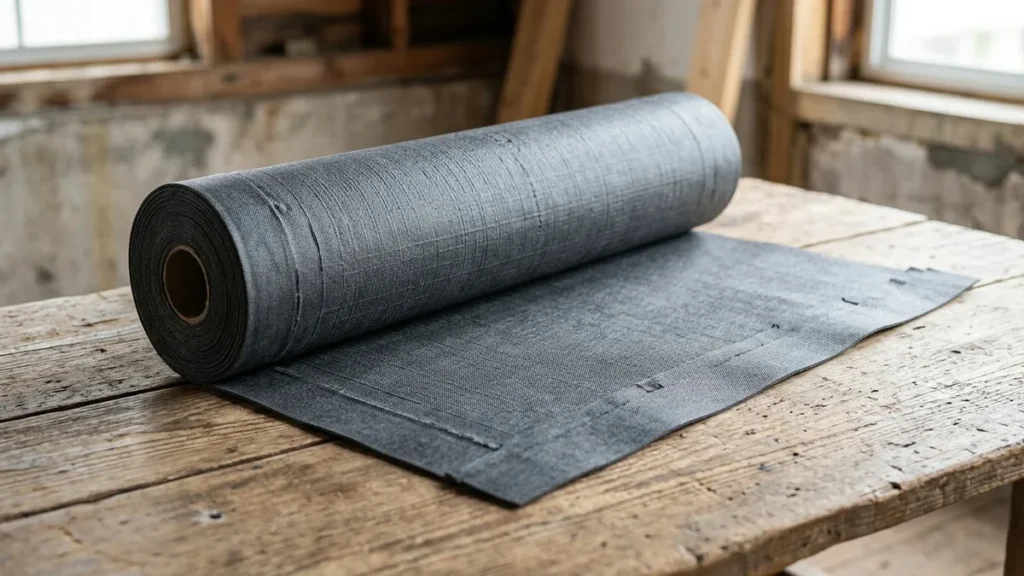

Ali is a Canada-based roofer who has spent around five years working hands-on in roofing, from servicing to installs. He started this site to share what he has picked up on the job in plain, practical guides. Each article is written to be clear, useful, and grounded in real roofing work rather than theory.
Steel roof underlayment is the water-resistant layer installed between your roof deck and the metal panels. It does one main job: it keeps water out if wind, ice, or a loose fastener ever lets moisture past the metal. Think of it as the roof’s second line of defense, working quietly under the panels for the life of the system.
If you want the short answer, here it is. The best material to put under a metal roof, for most homes, is a high-temperature self-adhered membrane in the valleys and along the eaves, paired with a heat-rated synthetic across the main field. Felt still works on tight budgets and simple roofs, but it is the weakest of the three common options in heat and in longevity.
That single choice affects how long your roof lasts, whether you get leaks around fasteners, and how the deck handles the heat that metal panels trap. This guide walks through every material, the temperature ratings that actually matter, how installation works, what it costs, and how to match the right product to your climate and roof design. You’ll also see where the popular Owens Corning products fit, and how to buy underlayment without overpaying for features you don’t need.
What Steel Roof Underlayment Actually Does
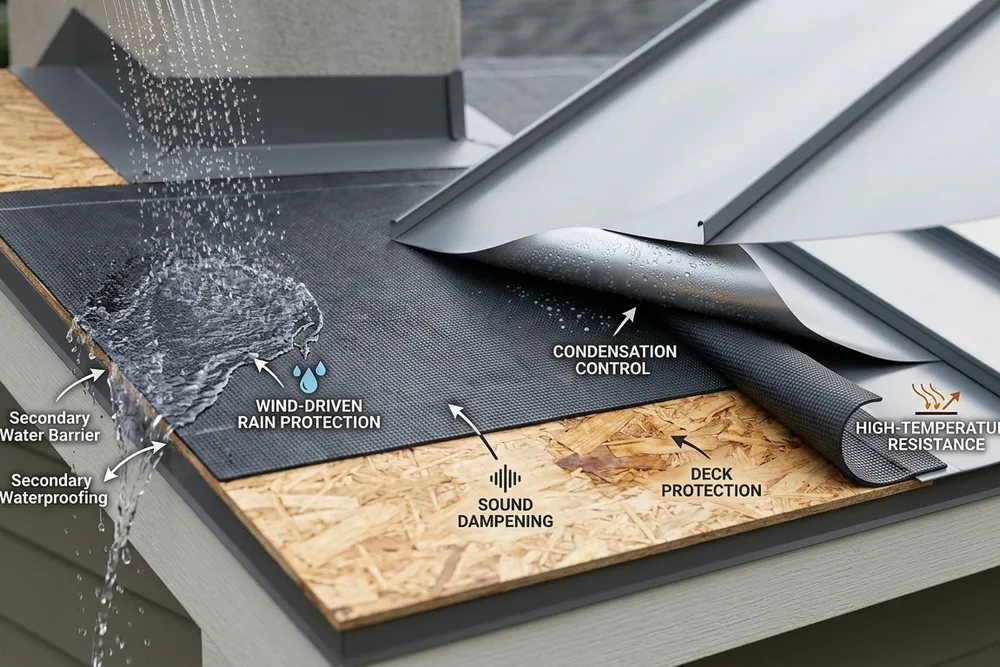
Underlayment sits on the roof deck (usually plywood or OSB) and goes down before the metal. It performs four functions at once.
First, it acts as a secondary water barrier. Metal panels shed almost all rain on their own, but driven rain, snow melt, and ice dams can push water sideways under a panel seam. The underlayment catches that water and routes it to the eave.
Second, it protects the deck during the build. Roofs sit exposed for hours or days between tear-off and the final metal. A good underlayment keeps the deck dry until the panels go on.
Third, it manages heat and condensation. Steel gets hot in summer and cold in winter. When warm indoor air meets a cold metal panel, moisture can form on the underside. The right layer, combined with proper ventilation, helps control that.
Fourth, it reduces noise and adds a small slip layer that makes panel installation cleaner. It won’t soundproof a room, but it dampens the sharp pinging some bare metal roofs produce.
Metal Roofing Underlayment Considerations
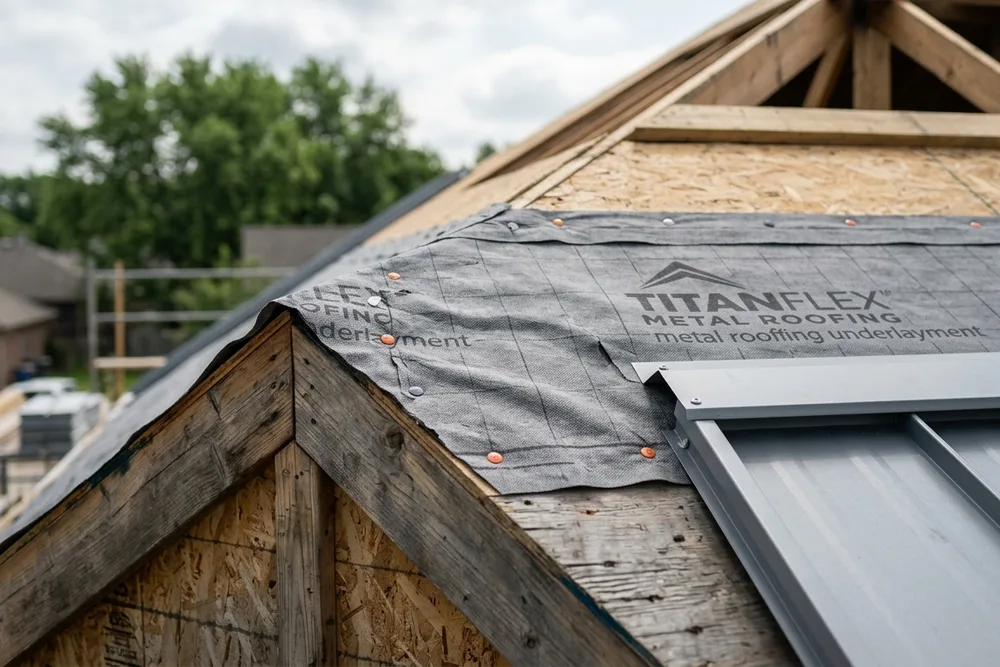
Before you pick a product, sort out the variables that decide which type will hold up. These metal roofing underlayment considerations matter more than the brand on the roll.
Heat is the big one. A metal roof surface can reach 160°F to 180°F in direct sun, and the deck below it runs hot too. Standard asphalt felt and budget synthetics can soften, wrinkle, or dry out under that load. This is why a high temp underlayment for metal roof projects is not a luxury in hot climates. It is the difference between a layer that lasts 30 years and one that fails in 8.
Roof slope changes the rules. Low-slope metal (below 3:12) sheds water slowly, so codes and manufacturers usually call for a fully adhered membrane across the whole deck. Steeper roofs can use synthetic in the field with self-adhered strips only at the vulnerable spots.
Fastener type matters. Exposed-fastener panels put hundreds of screw holes through the underlayment. A self-sealing membrane grips around each shank and closes the hole. Standing seam clips fewer penetrations, which gives you more freedom in the field.
Climate drives the rest. Cold regions with ice dams need a self-adhered ice and water barrier at the eaves. Hot, humid regions need high heat tolerance and condensation control. Coastal areas with wind-driven rain benefit from adhered membranes that won’t let water track sideways.
Local code sets the floor. Many jurisdictions require an ice barrier that extends at least 24 inches inside the exterior wall line. Always confirm the requirement for your area before you buy.
Roofing Underlayment Materials
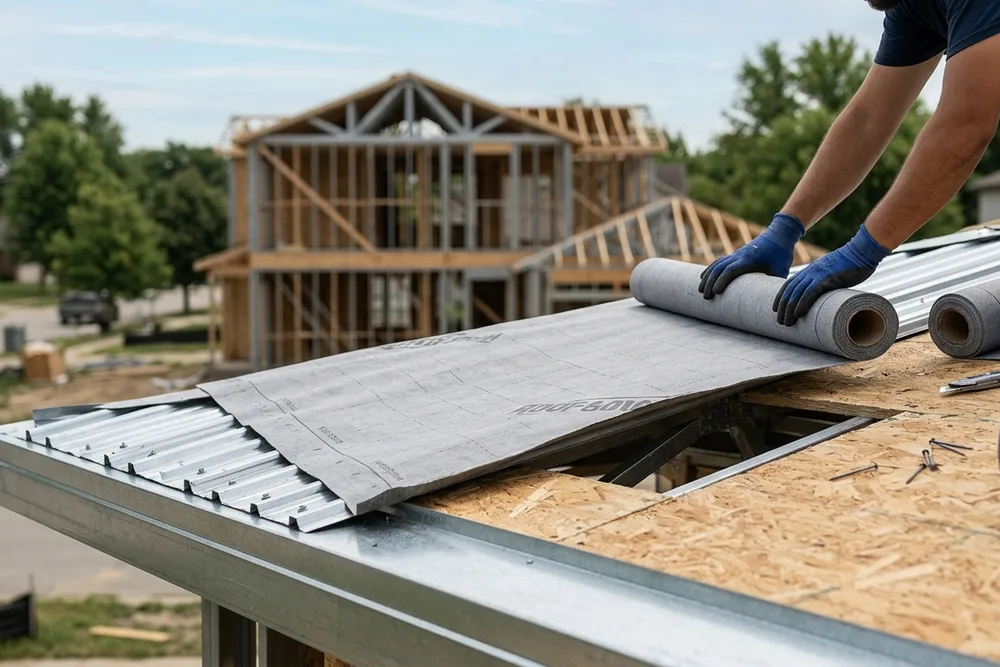
There are three roofing underlayment materials in wide use under steel: asphalt-saturated felt, synthetic, and self-adhered (peel and stick). Each has a clear place. The table below compares them on the factors that decide real projects.
| Feature | Asphalt Felt (#15 / #30) | Synthetic | Self-Adhered (Peel and Stick) |
|---|---|---|---|
| Typical heat rating | Low, softens under heat | Moderate to high (check data sheet) | High-temp versions to about 240°F to 260°F |
| Water resistance | Water-resistant, absorbs over time | Water-resistant, sheds well | Waterproof, seals around fasteners |
| Weight per square | Heavy (30 to 60 lb) | Light (about 10 lb) | Moderate |
| Tear resistance | Low, tears in wind | High | High |
| Walkability when wet | Slippery | Textured, safer | Grippy |
| UV exposure window | Days | Weeks to months | Weeks to months |
| Lifespan under metal | 10 to 20 years | 25 to 40 years | 25 to 50 years |
| Relative cost | Lowest | Mid | Highest |
| Best use | Simple, budget, steep roofs | Main field on most roofs | Eaves, valleys, low slope, full deck |
Felt is the old standard. It’s cheap and available everywhere, and you can still find rolls at most supply yards. The trade-offs are real, though. Felt is heavy, it wrinkles when it gets wet, it tears in gusty conditions before the panels go on, and it degrades faster under the heat a metal roof holds.
Synthetic underlayment for metal roof work has largely replaced felt on quality jobs. It’s a woven or spun plastic (polypropylene or polyethylene) that resists tearing, sheds water, and weighs a fraction of felt. One roll covers far more area, so crews move faster.
Self adhered underlayments are the top tier for waterproofing. They bond to the deck and seal around every nail and screw, which is exactly what you want at eaves, valleys, and around penetrations.
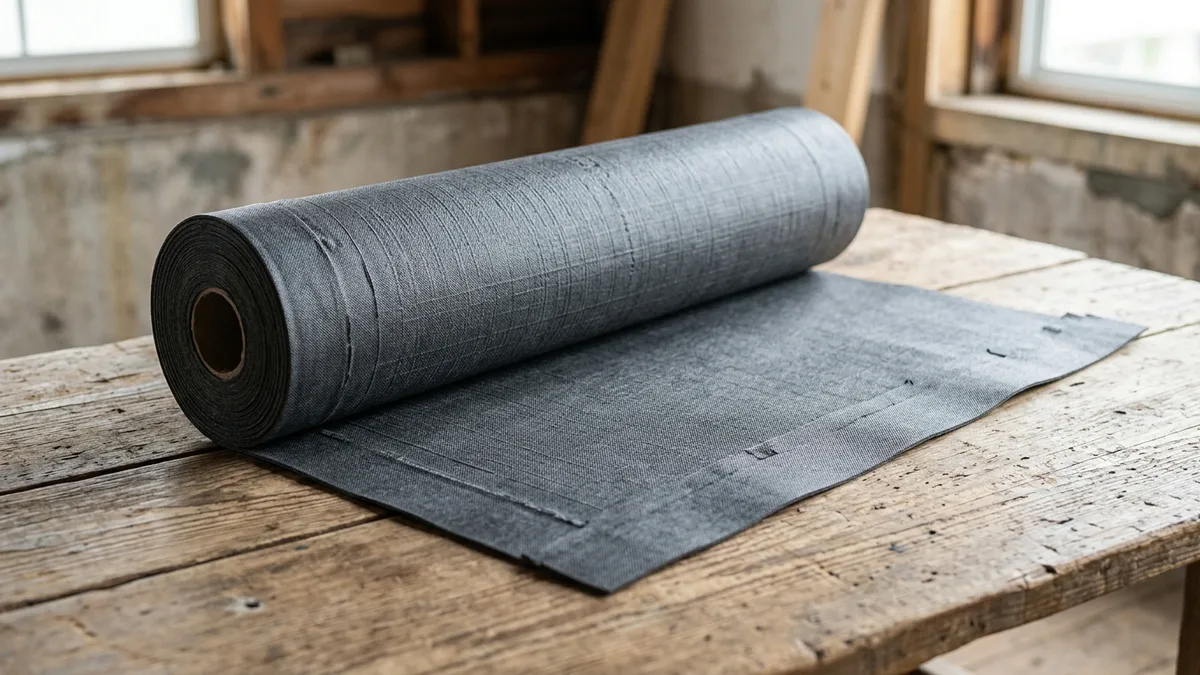
Self Adhered Underlayments
A self-adhered membrane is a rubberized or butyl-backed sheet with a peel-off release liner. You expose the adhesive, press it onto the deck, and it bonds permanently. This is the peel and stick underlayment for metal roof category, and it’s the most watertight option you can install.
The defining trait is self-sealing. When a screw drives through the membrane, the adhesive closes around the shank. Water that reaches a fastener has nowhere to go. That property is why every good metal roof puts peel and stick in the valleys and along the eaves, even when the field uses synthetic.
Heat rating is the number to watch here. Standard ice and water shields made for shingles are rated for lower temperatures, and their asphalt adhesive can soften and ooze under a hot metal panel. A high-temp version uses a butyl-based adhesive that holds up in the range of about 240°F to 260°F. If you’re buying the best peel and stick underlayment for metal roof use, confirm the data sheet lists a high-temperature rating, not just an ice and water label.
Where self-adhered membranes shine:
- Eaves and the first few feet of the roof, where ice dams form
- Valleys, where water volume concentrates
- Low-slope sections below 3:12, often required as a full-deck application
- Around chimneys, skylights, and pipe boots
- Exposed-fastener panels, where every screw is a potential leak point
The trade-off is cost and install care. Self-adhered rolls cost more per square, and once the membrane touches the deck, it’s committed. There’s no repositioning a bad line. Crews often use a split-back liner and a roller to keep placement straight and remove air bubbles.
Synthetic Underlayments
Synthetic underlayment is the workhorse for the main field of most steel roofs. It’s engineered plastic, printed with a walkable surface and a nail-line grid that speeds up fastening. Compared with felt, it’s lighter, stronger, and far more stable under heat and UV.
The advantages add up on a real job. A single roll can cover four to ten squares, which means fewer seams and less time on the roof. The material won’t wrinkle when it gets damp, and it resists tearing when the wind picks up during a partial install. Most synthetics offer a UV exposure window of several weeks to a few months, so a delay between dry-in and panel install won’t ruin the layer.
Not all synthetics are equal, and this is where buyers get caught. Cheap synthetics carry modest heat ratings and can distort under a metal roof’s trapped heat. For steel, you want a synthetic that lists a high service temperature. This is the best roof underlayment for metal roof jobs when you need broad coverage that still tolerates heat, without paying the full price of covering the entire deck in peel and stick.
A common and smart approach: run a heat-rated synthetic across the field, then add self-adhered membrane at the eaves, valleys, and penetrations. You get strong coverage where water rarely reaches, and bulletproof sealing where it does. That hybrid keeps cost sensible while protecting the weak points.
You’ll find synthetic rolls at contractor supply houses and big-box stores. If you’re checking metal roof underlayment Home Depot options, look past the label and read the temperature spec and the slope rating on the packaging. The store carries several tiers, and only some are rated for the heat a metal panel produces.
High Temp Underlayment: Why Heat Rating Matters for Metal
This section deserves its own space because heat is the number one reason metal roof underlayment fails early. Shingles insulate the deck a little. Metal does the opposite. It conducts heat straight down, so the underlayment lives in a hotter environment than it would under asphalt shingles.
Here’s what happens with the wrong product. A low-temp asphalt adhesive softens, migrates, and loses its grip around fasteners. A budget synthetic can shrink, curl at the laps, or grow brittle. Either way, the water barrier you paid for stops doing its job, and you won’t see it until a leak shows up on the ceiling.
Match the rating to the roof:
| Roof condition | Minimum underlayment heat consideration |
|---|---|
| Dark or bare metal in a hot climate | High-temp self-adhered (about 240°F+) at critical zones, high-heat synthetic field |
| Light-colored or reflective panels | High-heat synthetic acceptable in field, high-temp membrane at eaves and valleys |
| Standing seam over a ventilated deck | High-heat synthetic field, high-temp membrane at penetrations |
| Exposed-fastener panels | High-temp self-adhered preferred wherever screws penetrate |
| Low slope under 3:12 | Full-deck high-temp self-adhered membrane |
The cost gap between a standard and a high-temp product is small next to the cost of a torn-off roof. Pay for the rating.
What Is the Best Material to Put Under a Metal Roof?
This is the question most guides skip, so let’s answer it plainly. The best material to put under a metal roof depends on three things: your climate, your slope, and your panel type. There is no single winner for every roof, but there is a clear best answer for most.
For the typical steep-slope home in a mixed or cold climate, the strongest setup is a hybrid: high-temp self-adhered membrane at the eaves, valleys, and penetrations, with a heat-rated synthetic across the field. This gives you waterproof sealing where water actually gathers, and a durable, tear-resistant layer everywhere else, without the cost of covering the whole deck in peel and stick.
For a low-slope metal roof (under 3:12), skip the hybrid logic and go with a full-deck high-temp self-adhered membrane. Slow drainage means water can sit and work its way under seams, so you want the entire deck sealed.
For a hot, sun-baked climate with dark panels, prioritize the heat rating above all. A high-temp membrane at the critical zones and a high-heat synthetic field will outlast a cheaper spec by decades.
For a tight budget on a simple, steep roof in a dry climate, a quality synthetic across the field with self-adhered strips at the eaves and valleys is a reasonable compromise. Felt is the last resort, and only on short-term or outbuilding roofs where longevity isn’t the goal.
Put simply, the best material isn’t one product. It’s the right combination for your roof, and for most homes that combination is high-temp peel and stick at the edges plus heat-rated synthetic in the field.
Owens Corning Underlayment Products for Metal Roofs
Owens Corning is one of the most recognized names in roofing, and its underlayment line covers both the synthetic field and the self-adhered zones. If you’re comparing brands, here’s how the common Owens Corning products for metal roofs line up. Always confirm the current data sheet for exact temperature ratings and slope approvals, since specs get updated.
| Product | Type | Where it fits on a metal roof | Notes |
|---|---|---|---|
| WeatherLock Metal High-Temperature Ice and Water Barrier | Self-adhered, high-temp | Eaves, valleys, penetrations, low slope | Built specifically for metal, high heat tolerance, self-seals around fasteners |
| ProArmor Synthetic Roof Underlayment | Synthetic | Main field on steep-slope roofs | Walkable surface, tear-resistant, lightweight |
| Deck Defense High Performance Synthetic | Synthetic | Field underlayment | Slip-resistant texture, strong lay-flat performance |
| WeatherLock family (Mat, G) | Self-adhered ice and water | Eaves and valleys | Confirm high-temp variant for metal applications |
The pattern here matches the hybrid approach. Use the WeatherLock Metal high-temperature barrier at the eaves, valleys, and around anything that penetrates the deck, then run ProArmor or Deck Defense synthetic across the field. That pairing gives you a code-friendly, heat-tolerant system from a single manufacturer, which can simplify warranty coverage.
One buying tip: don’t assume a WeatherLock product labeled for shingles carries the same heat rating as the metal-specific version. For steel, the high-temperature membrane is the one you want at the sealed zones.
Metal Roof Underlayment Installation
Good material fails with bad install, so here’s how to lay underlayment for a metal roof correctly. These steps cover a standard steep-slope job. Adjust for low slope, where the whole deck gets a self-adhered membrane.
- Prep the deck. Confirm the plywood or OSB is dry, clean, and fastened tight. Sweep off debris and pop any raised nails. A wavy deck telegraphs through the panels.
- Snap your lines. Mark a straight chalk line at the eave so your first course runs true. Everything above keys off this line.
- Start with the eave membrane. Roll out the high-temp self-adhered barrier along the eave first. Codes commonly require it to extend at least 24 inches inside the warm wall line, so measure before you cut. Peel the liner, set the sheet, and roll it flat to remove air.
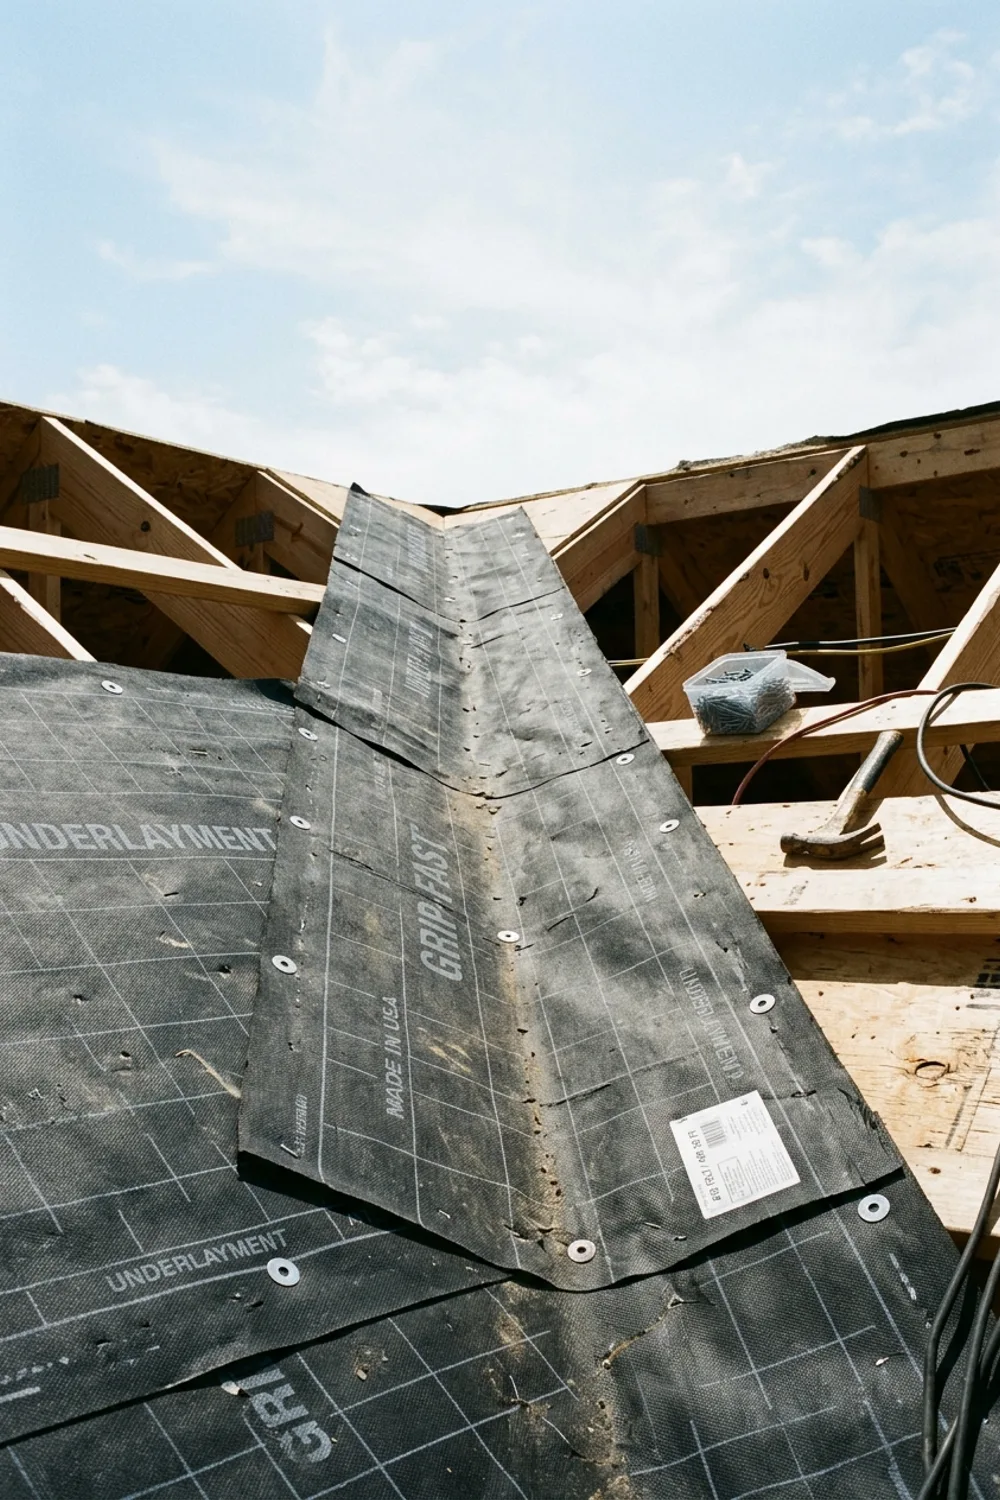
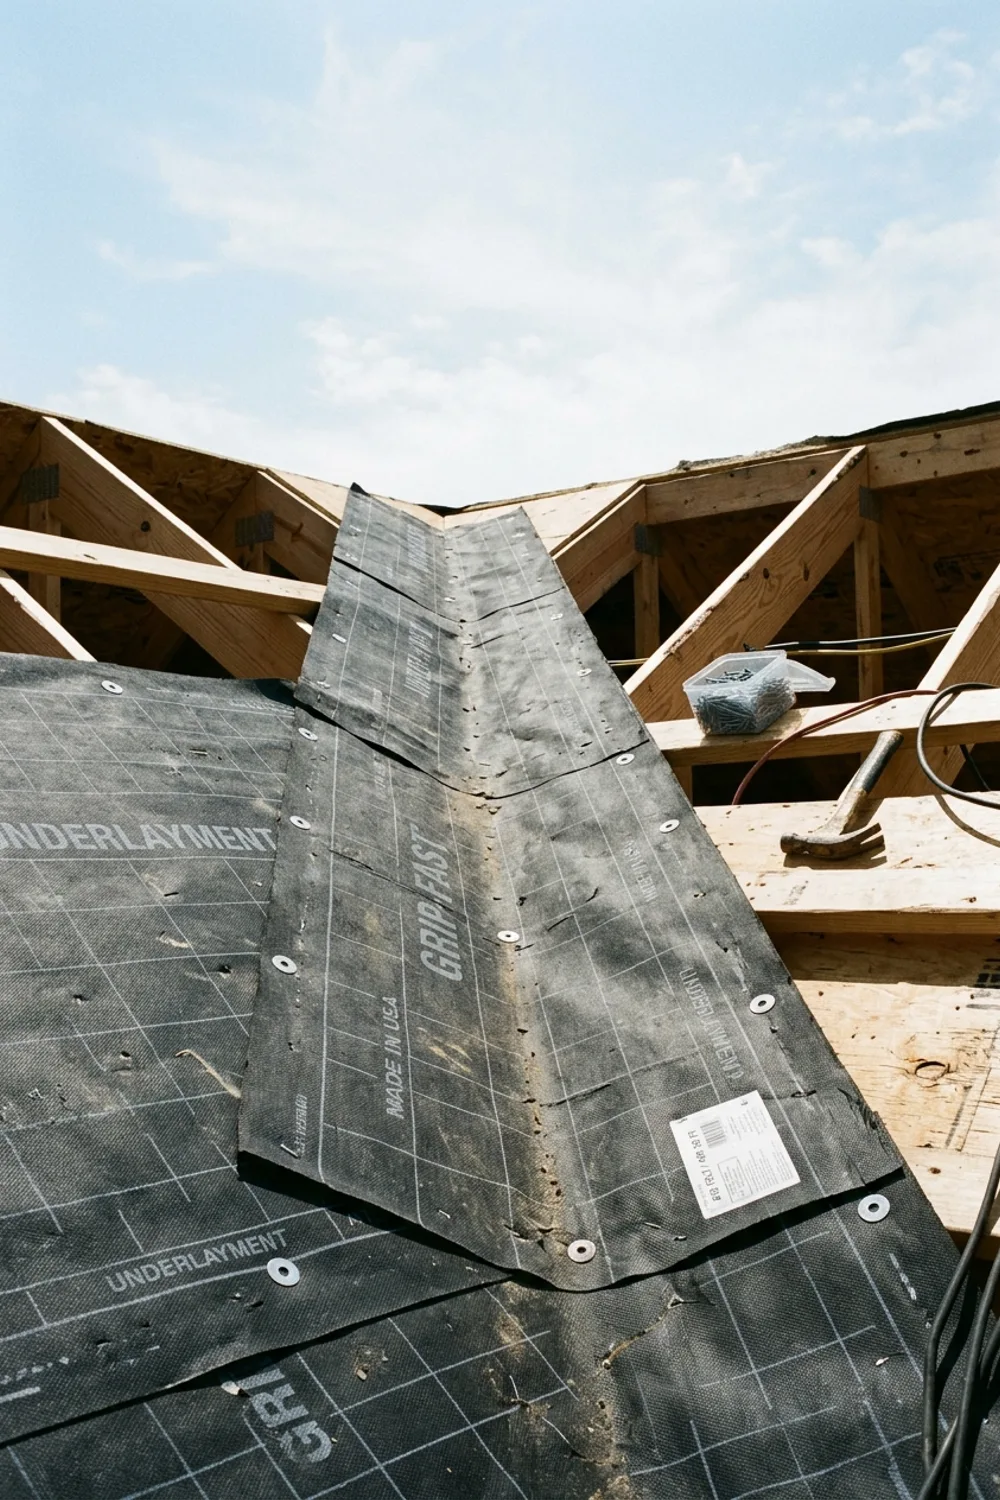
- Line the valleys. Center a self-adhered membrane in each valley and press it in tight. Valleys carry the most water, so this is not the place to save money.
- Lay the field. Roll the synthetic from the eave up, overlapping each course over the one below by the printed lap line (usually 4 to 6 inches on the horizontal, more on the vertical end laps). Working uphill keeps water shedding over, not under, each seam.
- Fasten correctly. Use cap nails or the fasteners the manufacturer specifies, driven along the printed nail lines. Cap nails hold better and seal cleaner than staples. Follow the fastening pattern on the roll.
- Seal penetrations. Wrap pipes, vents, and curbs with self-adhered membrane and cut it snug. Any hole in the deck gets sealed.
- Detail the ridges and hips. Carry the underlayment over the ridge per the manufacturer’s instructions so wind-driven rain can’t sneak under the cap.
- Don’t leave it exposed too long. Get the metal on within the underlayment’s UV window. Synthetics tolerate several weeks, but sooner is always better.
A few field notes. Keep laps consistent so water always flows over a seam. Roll self-adhered membranes with a hand roller in cool weather to get a full bond. And walk carefully: even textured synthetic gets slick with morning dew.
Metal Roof Underlayment Insulation and Condensation
Underlayment is not insulation, and it’s worth clearing that up. Metal roof underlayment insulation is really about condensation control, not R-value. The underlayment doesn’t add meaningful thermal resistance on its own. What it does, combined with the right assembly, is help manage the moisture that forms when hot and cold surfaces meet.
Steel conducts temperature fast. On a cold night, the underside of a metal panel can drop below the dew point, and moisture from the attic or interior can condense there. Left unmanaged, that drip can soak insulation and rot the deck.
Three things control it. Ventilation moves moist air out before it condenses. A proper vapor strategy in the assembly keeps interior humidity from reaching the cold surface. And in some builds, a separate condensation control layer or a vented batten system creates an air gap under the panels. The underlayment supports this system as the outer water barrier, but it doesn’t replace ventilation or insulation. If someone tells you the underlayment alone will fix condensation, be skeptical.
For homes in cold or humid climates, talk to your installer about a ventilated assembly. That’s where condensation gets solved, not in the underlayment spec sheet.
What Metal Roof Underlayment Costs
Budgeting is easier when you separate material tiers. Prices vary by region and supplier, so treat these as planning ranges, not quotes. A roofing square equals 100 square feet.
| Material | Rough material cost per square | Typical lifespan | Notes |
|---|---|---|---|
| Asphalt felt (#30) | Lowest tier | 10 to 20 years | Cheapest up front, shortest life |
| Standard synthetic | Mid tier | 25 to 40 years | Best coverage-to-cost for the field |
| High-heat synthetic | Slightly above mid | 25 to 40 years | Worth it for steel |
| Self-adhered (high-temp) | Highest tier | 25 to 50 years | Use at eaves, valleys, low slope |
For a whole-roof estimate, the hybrid setup usually lands between an all-synthetic job and an all-peel-and-stick job. You pay more than felt, less than covering the entire deck in membrane, and you get the waterproofing where it counts. Labor is the other half of the number, and self-adhered membranes take more time and care to install, which adds to the line item.
The mistake to avoid is buying the cheapest roll to save a few hundred dollars on a roof that should last 40 years. If the underlayment fails, you’re often paying to pull the metal to fix it. The material is a small slice of the total, so spend on the rating.
Which Type of Metal Roofing Underlayment Is Best for You
Use this quick decision guide to match your situation to a spec. Find the row that fits your roof and read across.
| Your situation | Recommended underlayment plan |
|---|---|
| Cold climate, ice dams, steep slope | High-temp self-adhered at eaves and valleys, high-heat synthetic field |
| Hot climate, dark panels | High-temp membrane at critical zones, high-heat synthetic field, prioritize heat rating |
| Low slope under 3:12 | Full-deck high-temp self-adhered membrane |
| Exposed-fastener panels | High-temp self-adhered wherever screws penetrate |
| Standing seam, ventilated deck | High-heat synthetic field, high-temp membrane at penetrations |
| Tight budget, simple steep roof, dry climate | Quality synthetic field, self-adhered strips at eaves and valleys |
| Outbuilding or short-term roof | Felt is acceptable, accept shorter lifespan |
The theme across every row is the same. Seal the water-prone zones with high-temp peel and stick, and cover the field with a heat-rated synthetic. That plan answers what kind of underlayment for a steel roof suits most homes, and it flexes cleanly for climate and slope.
If you only remember one rule, make it this: buy for heat and for the valleys. Those two choices prevent the leaks that show up years later.
Related Articles
If you found this guide useful, these related topics go deeper into the parts of a metal roof system that work with your underlayment.
- Standing seam vs exposed-fastener metal roofs: which panel is right for your home
- Ice and water shield requirements by climate zone and local code
- Metal roof ventilation and condensation control: building a healthy assembly
- Synthetic vs felt underlayment: a full breakdown for every roof type
- How to read a roofing underlayment data sheet: heat ratings, slope, and warranty
- Metal roof cost guide: panels, underlayment, fasteners, and labor
Roofing
Underlayment is one layer in a larger roofing system, and it performs best when the rest of the roof is done right. The deck has to be sound, the ventilation has to move air, the flashing has to be watertight, and the panels have to be fastened to spec. A premium membrane can’t rescue a poorly built roof, and a well-built roof needs a matched underlayment to reach its full life.
When you plan a metal roofing project, treat underlayment as a system decision, not an afterthought. Pick the material put under metal based on your climate and slope, seal the valleys and eaves, and confirm every product’s heat rating before it goes on the deck. Get those choices right and the underlayment roof layer will protect your home quietly for decades, exactly as it should.
FAQ
What kind of underlayment for a steel roof?
For most homes, use a high-temperature self-adhered (peel and stick) membrane at the eaves, valleys, and penetrations, with a heat-rated synthetic across the main field. On low-slope roofs under 3:12, cover the whole deck with a high-temp self-adhered membrane. The key is choosing products rated for the heat metal traps, not standard shingle-grade materials.
What is the best material to put under a metal roof?
There’s no single best product for every roof, but the strongest general answer is a hybrid: high-temp peel and stick at the water-prone zones plus heat-rated synthetic in the field. It gives you waterproof sealing where water gathers and a durable, tear-resistant layer everywhere else, without the cost of covering the entire deck in membrane. Match the exact spec to your climate, slope, and panel type.
What is the best underlayment for your roof?
The best underlayment is the one matched to your specific conditions. Cold climates need self-adhered ice barriers at the eaves. Hot climates need high heat ratings. Low slopes need full-deck membranes. For a typical steep-slope home, a high-heat synthetic field with high-temp self-adhered strips at the eaves and valleys is the reliable pick.
How do you lay underlayment for a metal roof?
Start by prepping a clean, dry deck. Roll out the high-temp self-adhered barrier at the eaves first, extending it inside the warm wall line per code. Line the valleys with membrane, then lay the synthetic from the eave up, overlapping each course on the printed lap line. Fasten along the nail lines with cap nails, seal every penetration with membrane, and get the metal panels on within the underlayment’s UV window.
Does a steel roof need underlayment?
Yes. Even though metal panels shed almost all rain on their own, underlayment is the secondary water barrier that handles driven rain, ice melt, and any water that reaches a fastener. Most building codes require it, and skipping it voids many manufacturer warranties. It also protects the deck during construction and helps manage condensation.
Can you use felt under a metal roof?
You can, and felt still meets code in many areas, but it’s the weakest of the three options under steel. Metal traps heat, and felt softens, wrinkles, and degrades faster in that environment. It’s acceptable for short-term roofs, outbuildings, or tight budgets on simple steep roofs. For a roof meant to last decades, a heat-rated synthetic or self-adhered membrane is the better investment.
Pingback: Roofing For Low Slope Roof: A Practical Guide – throneroofing.online
Pingback: Roofing Z Flashing: A Practical Guide – throneroofing.online
Pingback: Roof Drip Edge Flashing: A Practical Guide - throneroofing.online